Add Webex Control Hub Integration for Webex Registered Endpoints for (FedRAMP)
Introduction
This article will provide your team with a method of adding FedRAMP Webex Control Hub registered Video Systems to your Synergy SKY Management Suite. It's a streamlined process to add multiple Video Systems to the Suite without the need to create additional accounts on each endpoint.
Note: This should be done from a computer with access to the Suite.
Prerequisites
| Service Account |
This account will be used for the FedRAMP Webex account at https://admin-usgov.webex.com and will need admin access in FedRAMP Control Hub
|
| Application Integration |
Contact Cisco and ask them to enable Application Integration for Control Hub
|
| Synergy SKY Suite 30.03 |
Minimum Version 30.03.2719
|
| Endpoint Registration |
Register endpoint as workspace
|
Configuration Reference
Step-by-Step Guide
Prepare Integration within Suite
We'll start this journey by preparing some information in the Suite that we'll need later. This should cut down on the time the Webex page is waiting so we don't risk idling out of the creation page. Once this section is completed, keep the Suite open and begin the next section in a new tab, as we will be moving between the two.
- In your Suite, navigate to GENERAL SETTINGS > Integrations Settings
- Under "Connections", select "ADD CONNECTION"
- Select "Cisco FedRAMP Webex" from the "Connection type" drop-down
- Name your connection ("FedRAMP Webex API" or whatever your heart desires)
- Add Company Name, Contact Email
- Access Token will be found in next steps

Log in & begin creating FedRAMP Webex Integration
Now we will create the integration in FedRAMP Webex that the Suite uses to connect with the Control Hub.
- In a chrome browser open a new tab and navigate to: https://admin-usgov.webex.com/
- Log in using your service account you created with admin access into FedRAMP Control Hub. This user/admin account needs to be in the same environment that your endpoints are registered to
- Open Developer Tools from Chrome Browser by pressing F12, or Customize at the top right, More Tools > Developer Tools
- Navigate to Application, under Storage expand Session Storage, select https://adminusgov.webex.com, select the accessToken entry. Copy the access token
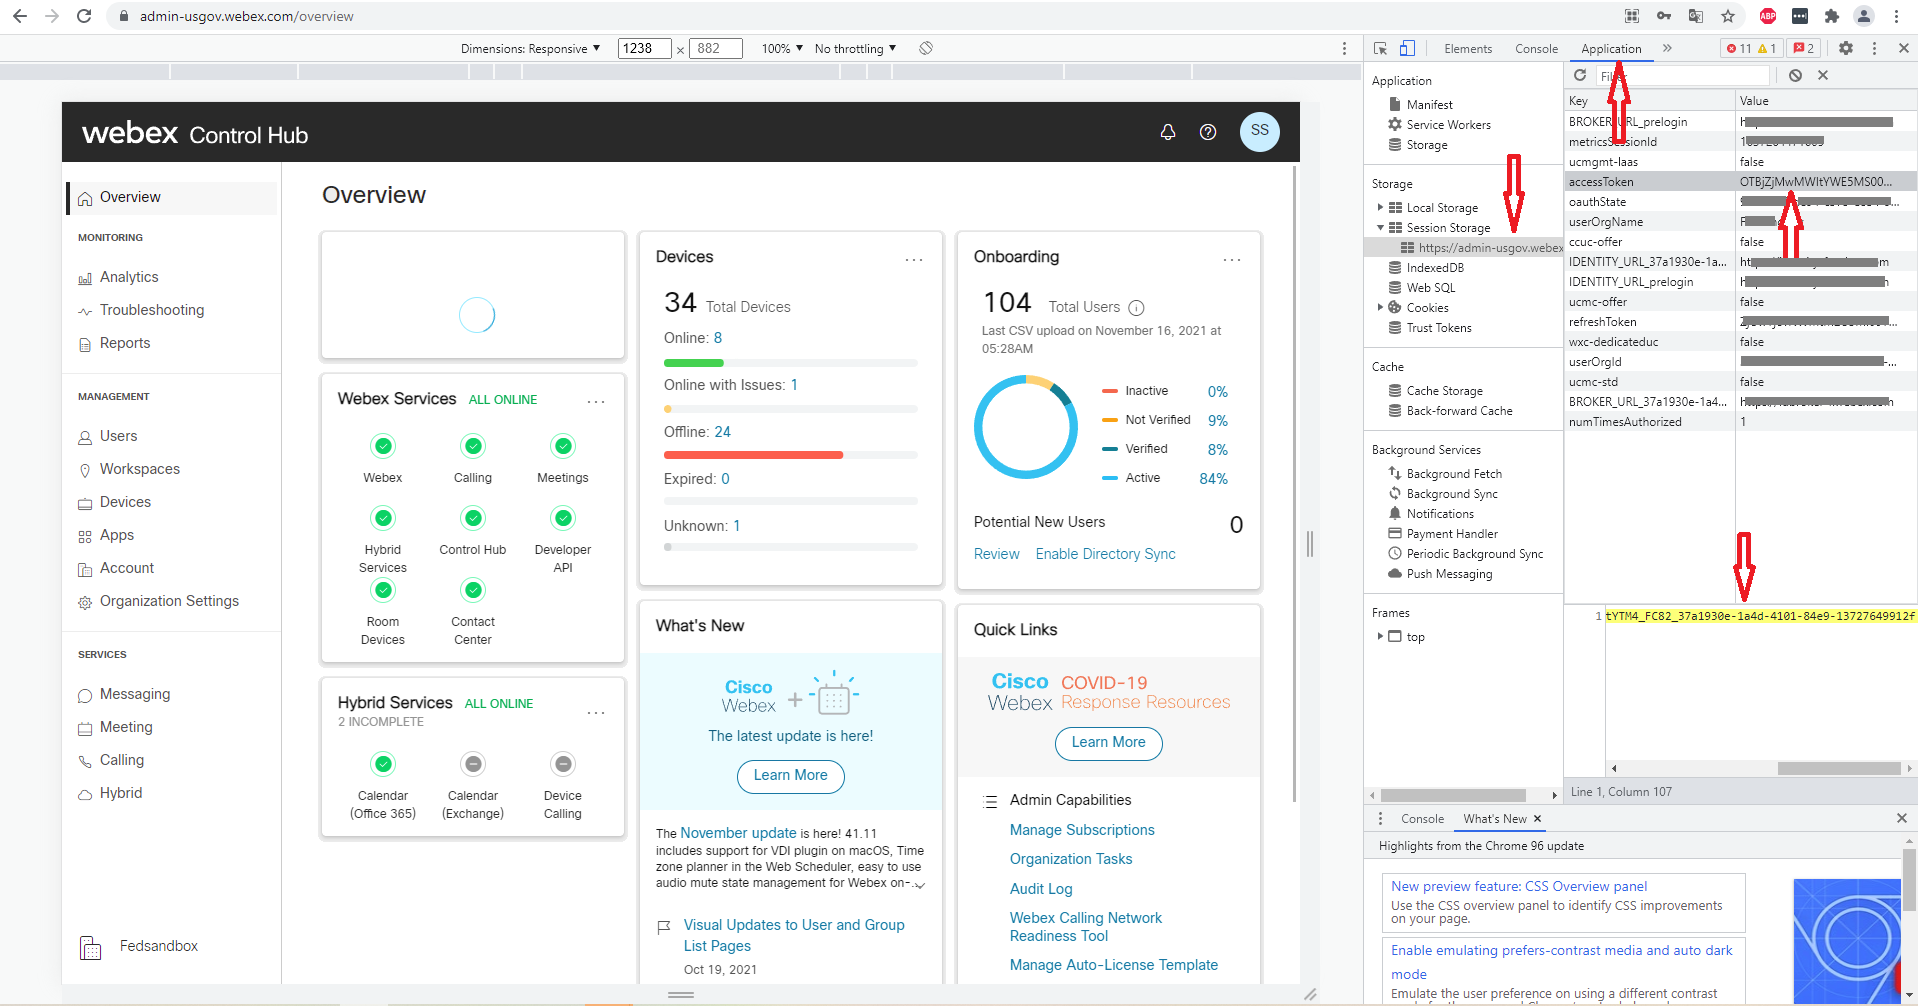
*Note: Be sure to copy the entire access token. Quickly move onto the next step as access tokens can expire
Example access token:
MzU3ZmEyOTAtZjEDAtNmEwMzmM0LTljNDAtNmEwMzc2NDM0NWE4ODRlYWFc2NQtOGR
m_PF84_ce861fba-6e2f49f9-9876-b354008-a8
- Move back over to Suite Integration and paste the token in the Access Token box
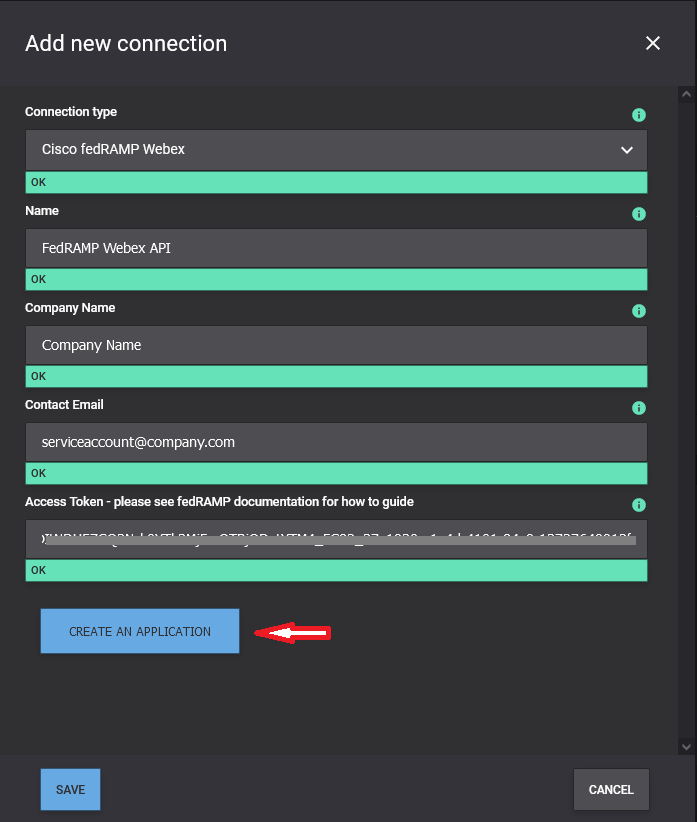
- Select Create an Application
- Client ID, Client Secret and Redirect URL will appear
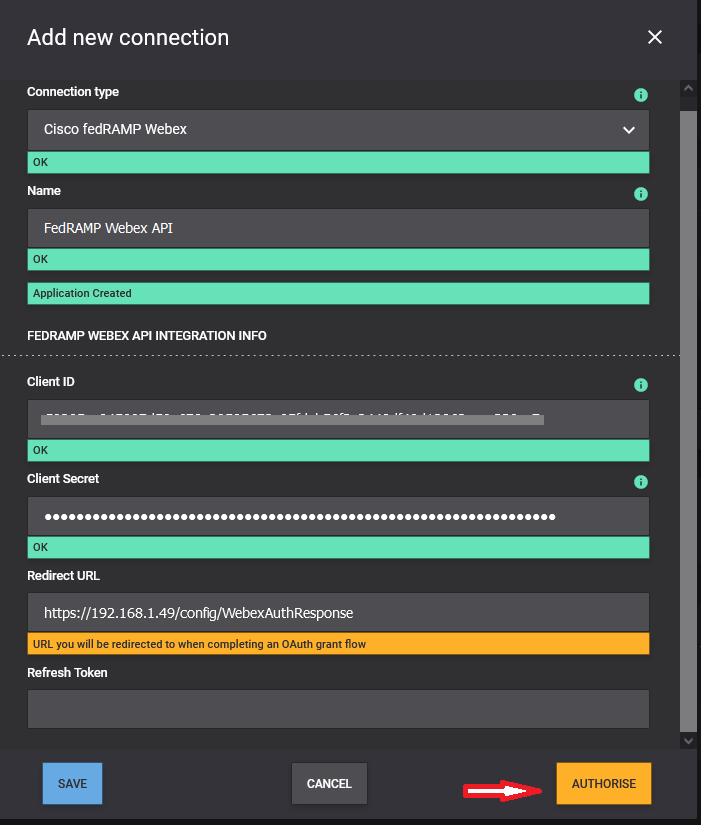
- Select Authorize
- You will be redirected to FedRAMP Webex API and select accept
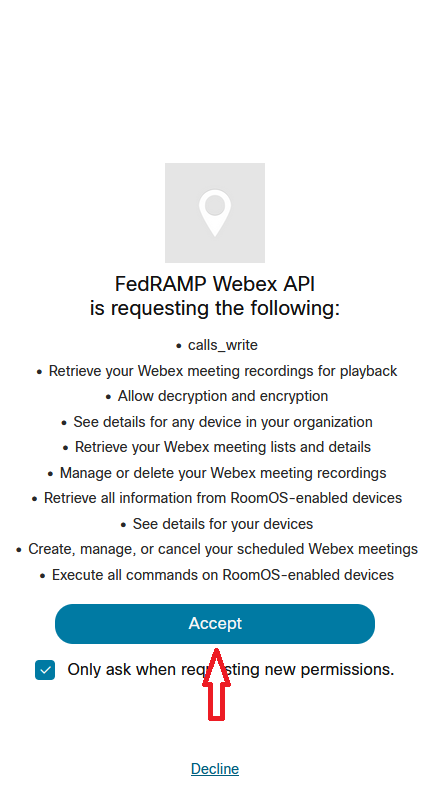
- Redirect back to the Suite with an Authorization accepted window
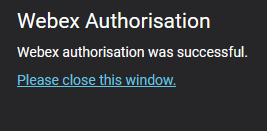
- Return to Suite Config and you will see that it is now authorized
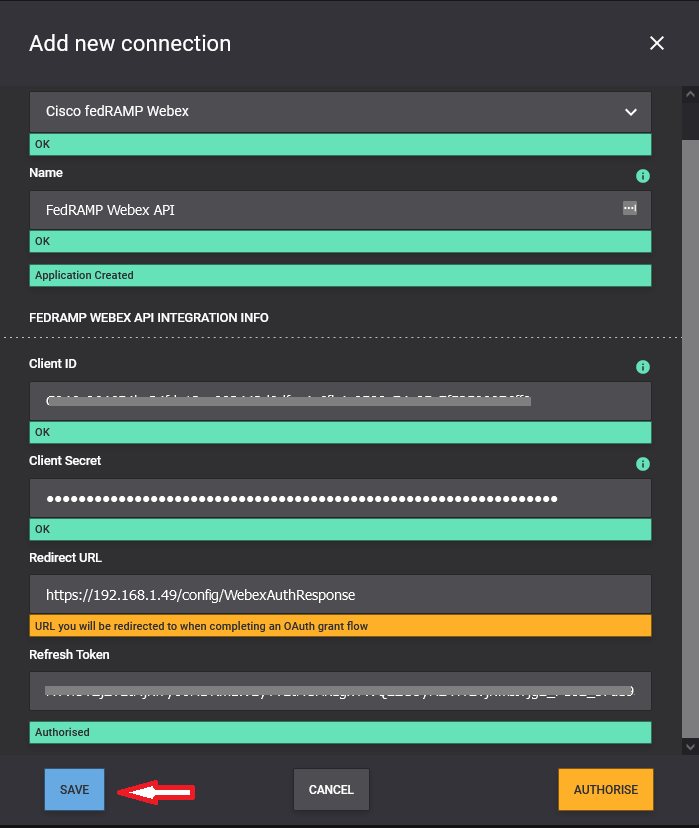
- Save, Save Changes at the top right
- Navigate to: https://ipaddress/config/General-Settings/Video-Systems
- Add "Webex Video System"
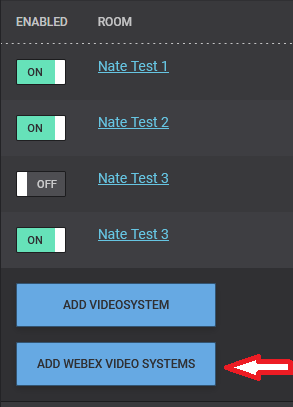
- List of Video systems will be populated
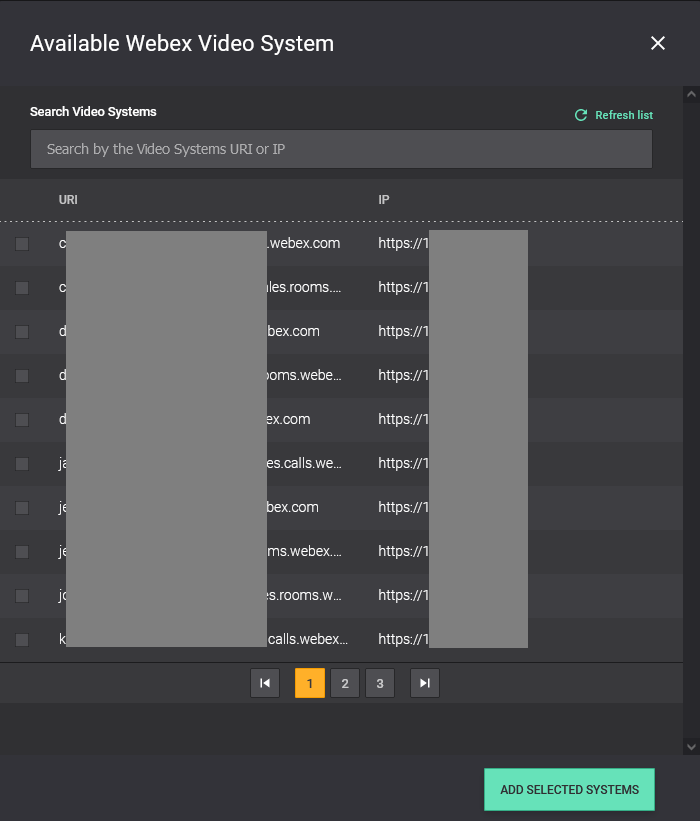
- Select the rooms you want to add and click "Add Selected Systems"
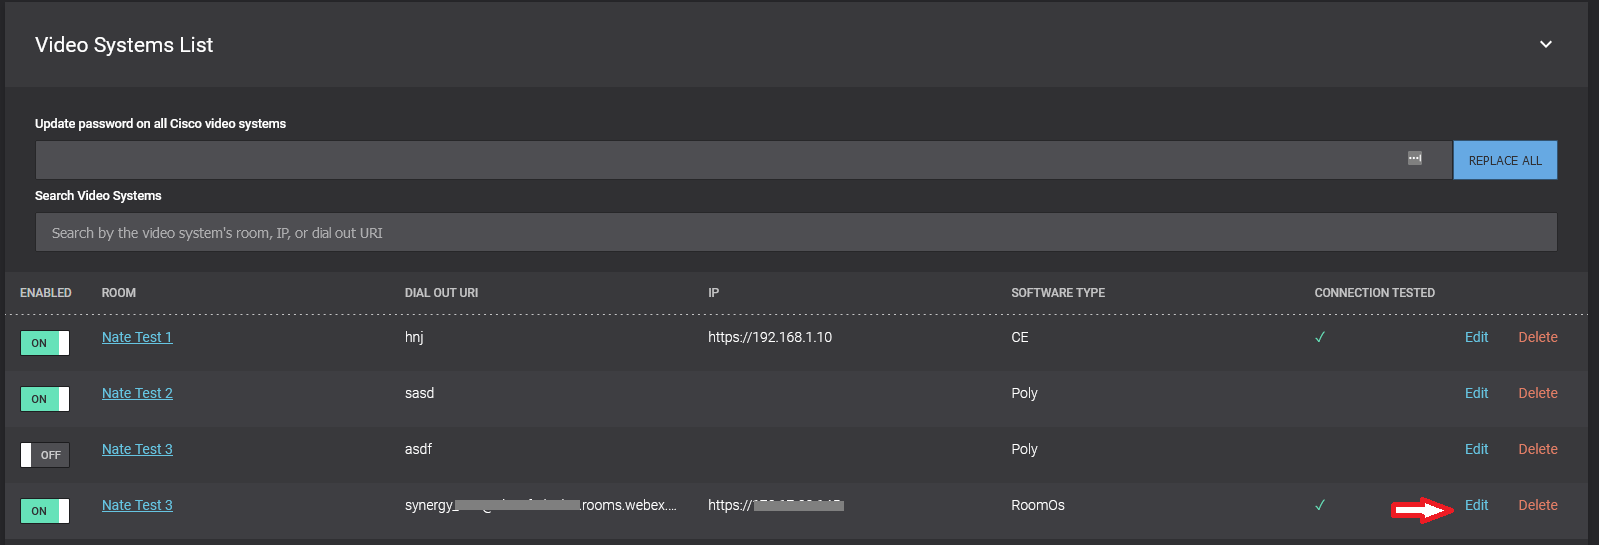
- Edit the systems you added and associate it with your room resource
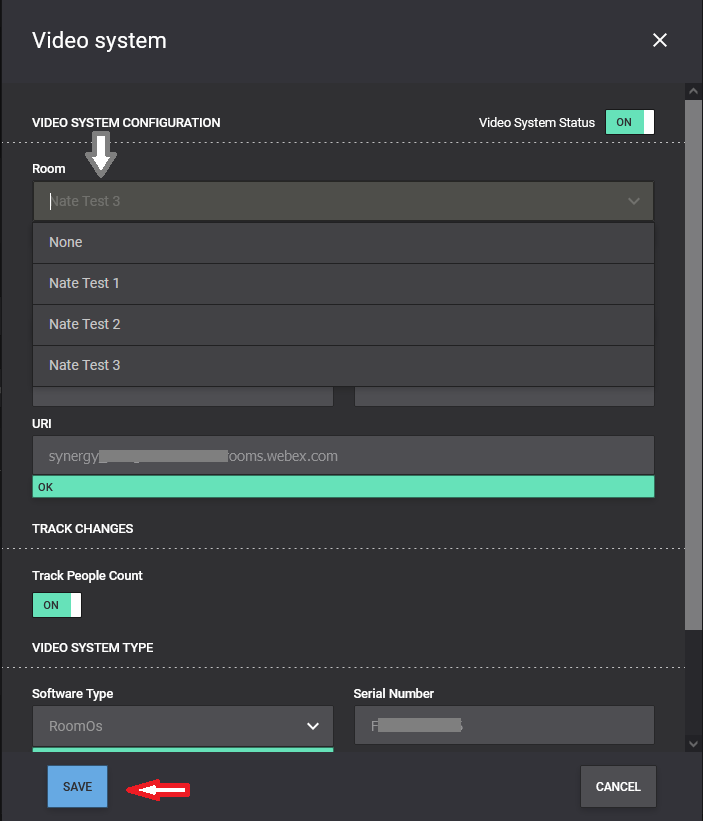
- Attach Room and Save
- Save Changes at the top right and deploy the configuration
You're all set, enjoy!

Jump to...


