Once the basic Platform configuration has been completed, it is time to start configuring the software. This includes the very important step of patching the Management Suite to the latest version of the software.
This article explains how to:
You can view our video tutorials at the bottom of this article for a full walkthrough assisted by one of our engineers.
| Synergy SKY Platform Configuration |
The Synergy SKY product has been deployed and running in a virtualized environment and the basic platform configuration has been completed. If this requirement is not already fulfilled, please start here. |
| API Key |
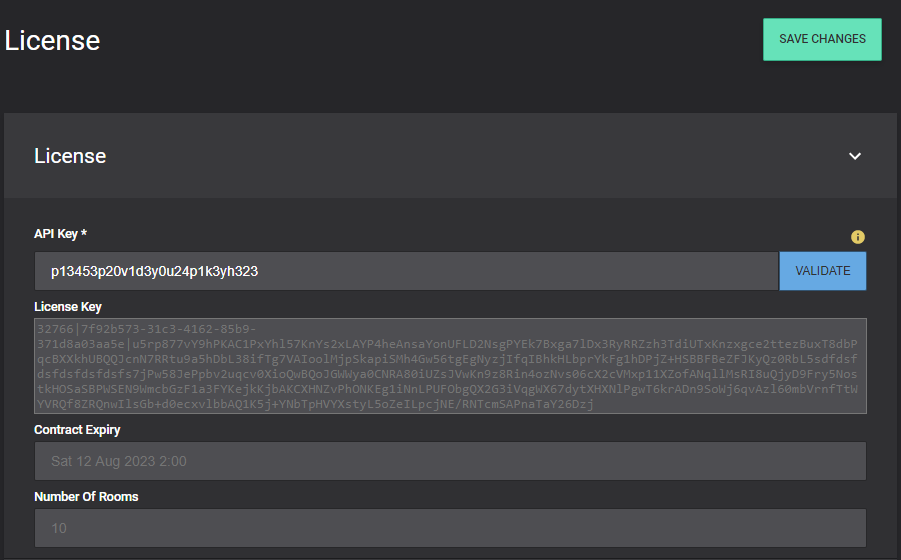
As a Synergy SKY customer you receive a license document containing information regarding your license. Before you can continue with this guide, make sure that you have your API key available. |
| Service account | This account should have FullAccess permissions to the Room resource calendars we intend to have the Synergy SKY software monitor |
| Room resource calendar |
The room must have the appropriate permissions and settings based on your current calendar integration |
| Video System access | IP address, login credentials |
| Internet access from Software server | This is required for license activation as well as some MCU and Sensor access |
Note: This guide will explain how to configure the Synergy SKY Software for EWS, using a Cisco endpoint and Cisco Webex. For Graph API, Google API, or for more details on EWS API, as well as adding other endpoint and meeting types, please refer to our guides.
For more details related to each of the configuration pages in this guide, please refer to the Configuration Reference.
1. Open the browser and enter the server URL/IP address, e.g. https://192.168.56.185.

2. Click Synergy CONFIG to enter the global configuration. When prompted for credentials, use the following default credentials:
Username: admin@localhost
Password: Newpassword6
Note : You can change the passwords following this guide : Change the passwords on the appliance
3. You will be redirected to the End User License Agreement, and this agreement has to be accepted before you can proceed with the configuration


Important Notes:
["OK"]
Synergy SKY Management Suite uses a base image + patch for initial installations. This base + patch method helps keep our various deploys consistent and simple. Updating the software after initial deploy is crucial for proper functionality.


Note: The software must be patched before continuing.
The Synergy SKY Software requires a calendar integration in order to run. The supported calendars are Microsoft Exchange on-prem, Microsoft Office 365 (Exchange Online) and Google Calendar. You will need an Exchange or Google Workspace administrator user to configure the respective calendar system prior to adding the calendar integration by following the relevant guide below:
Note: This guide will explain how to add an EWS integration. For Graph API, Google API, or for more details on EWS API, please refer to our guides. Also see our Configuration Reference for more information on the individual fields.
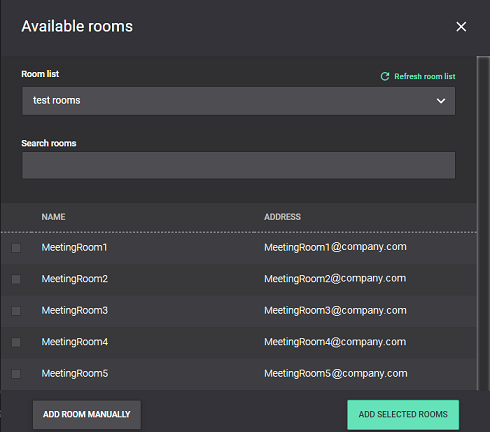
In this section, we will choose which meeting room resources should be monitored by the Software.
For adding additional rooms, or rooms of different types, see our How To on adding rooms in this guide.


Note: You can click 'Edit' next to the newly added room to change the occupancy limit, or its prescribed VMR pool.
In this step we will add and define a video system, then we will tie it to the room we configured in the previous step.
For more details, or instructions on adding systems of different types (Poly, other), see our guide.
This is where we define to the software what meeting type to look for in order to push a green JOIN button to the endpoint. In this section, we will add a matching rule for Webex meetings.
For more details, or how to add and organize rules for additional meeting types, see our How To here.

After each change we make in the various sections of the software, you must SAVE CHANGES before moving to the next. After saving, a notice appears stating that your changes have been saved to the database, but not yet deployed/applied.
Note: You can choose to deploy after every SAVED change, or you can make multiple changes to the configuration and deploy them all at once. For additional information on how to name, organize, and manage your configuration versions, see our How To here.
You have now completed the basic configuration of the Synergy SKY Software, and are ready to tailor make it to suit your needs. The next step in the configuration procedure is to review our guides that describe how to expand and configure the Software to your specific environment.
For an overview of all sections of the Configuration Tool, please refer to the Configuration Reference.